Depending on your web conferencing service and setup, you may need to configure your web conferencing information in the MEETS Admin Panel.
For Cisco Webex:
A) For Webex Meetings and/or Webinars ( for Webex Trainings please see section "B" below):
1) Go to your MEETS admin platform. Press on the "Conferencing Accounts" tab, and press on "Setup"

2) You will be taken to the Webex authentication page. You will need to log in with a full Webex admin account.

3) Webex will request accepting the permissions for the integration to work. Make sure to check "Only when ask when request requesting new permissions"

B) If you are using Webex Trainings:
- When authenticating to Webex using username and password, no additional steps are needed
- When authenticating to Webex using SSO, please contact CirQlive Tech Support (tech-support@cirqlive.com) in order to complete the setup
Aside for the above, please see Important notes when setting up Cisco Webex with MEETS, for setting up whitelisting and allowing attendees to join before host.
=> click here to go to the next article in the Admin Manual: Default MEETS Settings
For GoToMeeting/GoToTraining/GoToWebinar: No additional steps are needed.
=> click here to go to the next article in the Admin Manual: Default MEETS Settings
Zoom:
1. Log in to your MEETS admin panel. If you need help logging in, please contact our support <tech-support@cirqlive.com>.
2. In the MEETS admin, open the "Conferencing Account" tab.
a) If you have not yet configured Zoom, the fields will be empty and ready for the configuration as in the screenshot below.

b) If you have already have Zoom a previous Zoom setting, as in the screenshot below, press on edit or clear configuration to enable entering the updated information.

3. Enter your Zoom Marketplace. You have 2 methods of entering it.
a) Go to the Zoom admin panel and click on Advanced>App Marketplace (screenshot a).
b) Go directly to https://marketplace.zoom.us/ and log in with your Zoom admin account credentials (screenshot b).
Screenshot a
screen shot b.

4. Create your Server to Server OAuth app
a) Click on Develop>Build App

Choose Server to Server OAuth App, and click "Create"

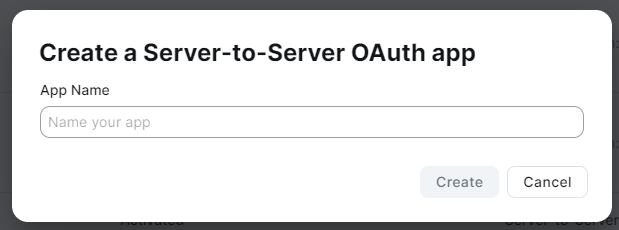
b) Give the app the name of your choice, and press "Create"
5) Obtain the Zoom app credentials and enter them into the MEETS admin panel:
After creating the app in stage 4, in the App Credentials section in Zoom, you will see an Account ID, Client ID and a Client Secret.
Go to the MEETS admin panel. In the API Key field, enter the Account ID from Zoom, enter a colon and then enter the Client ID
Example: If the Account ID is 1234abc and the Client ID is 5678def, then enter into the MEETS API Key field 1234abc:5678def
Enter the Client secret into the API Secret field.
Please note that the "submit" button in the MEETS admin should only be pressed after the complete setup in the Zoom admin as seen below. Do not press it yet at this point.

6. Continued setup in Zoom -Information and Scopes sections.
In the Zoom admin panel, in the "Information" section, enter your information and press "Continue".
In the "Feature" section, there is no need to alter anything. Press "Continue".
In the "Scopes" section, in the search section, enter the list of the scopes below, and press "+Add Scopes"

meeting:read:list_past_instances:admin
meeting:read:meeting:admin
meeting:delete:meeting:admin
meeting:write:meeting:admin
meeting:update:meeting:admin
cloud_recording:read:list_recording_files:admin
cloud_recording:delete:recording_file:admin
report:read:list_meeting_participants:admin
report:read:list_webinar_participants:admin
user:read:settings:admin
user:read:user:admin
user:read:list_users:admin
user:delete:user:admin
user:update:status:admin
user:update:settings:admin
user:update:password:admin
user:write:user:admin
user:update:user:admin
webinar:read:webinar:admin
webinar:read:list_past_instances:admin
webinar:delete:webinar:admin
webinar:write:webinar:admin
webinar:update:webinar:admin
In the "Scope Description" section, at the bottom of the Scope section, enter: as needed basis. No data is stored.

7. In the Activation section in the Zoom app setup, activate the app.
8. Go back to the MEETS admin panel, and press on "Submit".


9. Account Provisioning Settings: If you choose to turn on automatic account creation (see Step 10 below), you can choose the method for automatically creating accounts in these settings.
Zoom offers the following Account Provisioning methods:
- Regular creation (create): Users will receive a confirmation email from Zoom asking them to verify their newly created Zoom account. Using the verification link in the email, users will be able to login to their Zoom account and change their password and other profile settings. In most cases, this is the recommended Account Provisioning method, as it will enable your users to access their Zoom account outside the LMS as well, without requiring assistance from a Zoom administrator.
- Auto creation (autocreate): Users will not receive a confirmation email from Zoom, and will not need to verify their newly created Zoom account. However, without the Zoom confirmation email, users will require assistance from your institution's Zoom administrator in order to access their Zoom account from outside the LMS.
- Creation for integrated use only (custcreate): Users created in this way have no password and will not able to log into the Zoom web site or client. If you would like to use this option, you will need to request Zoom to recognize your account as an "API partner".
- Creation for integration with SSO sign in ability (ssocreate): This option is similar to custcreate, but the user will also be able to access the Zoom website via your institution's Identity Provider. If you would like to use this option, you will need to request Zoom to recognize your account as an "API partner" and request to have the "pre-provisioning SSO User" option enabled.
10. After completing the above steps for configuring the Sitewide Settings, you can choose to configure “Per Connection Settings” for each instance for which you wish to setup automatic account creation.

----- Next Article: Default MEETS Settings -----